3.6.1. ModelTab
3.6.1. ModelTab
This mode sets the camera and model to add the pattern and manage the data file.
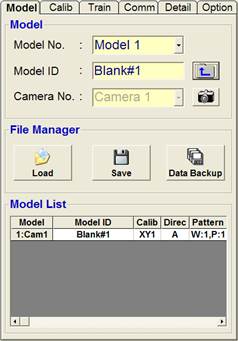
n Model No. : It sets the model to add the pattern.
n Model ID : It sets the model name.
n  Button : It saves the entered model name.
n Camera No. :
Cameras that will process images will be displayed by model.
The corresponding camera No. is automatically set by the camera selected in the “Image Display Window”.
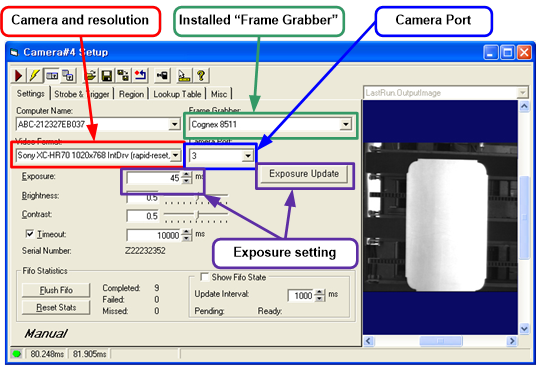
n When you click on the  button, the following camera setup window appears.
Check the “Frame Grabber” installed on the computer, and set the camera, resolution and camera port to use.
n Load : Load the data file.
Load the “HRVisionQV_Hi5_Press_init.vpp” data file in the “C:*Program Files*HHI Robotics*HRVision” forder
n Save : Save the data file.
Save the “HRVisionQV_Hi5_Press_init.vpp” data file in the “C:*Program Files*HHI Robotics*HRVision” folder.
In addition, in saving, the previously saved data file will be saved as the “HRVisionQV_Hi5_Press_init_bak.vpp” file, which can be utilized as the data file for recovery.
n Data Backup : Backup the data file.
Backup the “HRVisionQV302_Hi5_2D_init.vpp” file and the “HRVisionQV302_Hi5_2D_init_bak.vpp” file in the selected folder as shown in the following figure.
The default data file backup folder is created as “HRVision Hi5 2D Backup_DateTime” under “C:*Program Files*HHI Robotics”.
The data file that is backed up can be utilized as one for recovery.
