3.5.4. Ethernet connection between Hi5a and SafeSpace
3.5.4. Ethernet connection between Hi5a and SafeSpace
It is required to connect Ethernet 1 of SafeSpace to CNETN1 or CNETN2 of BD511 board to use SafeSpace as shown in the following procedure.
1. Select the ethernet port of Hi5a to be connected to the SafeSpace module.
① Press the R.. button and enter the number 257
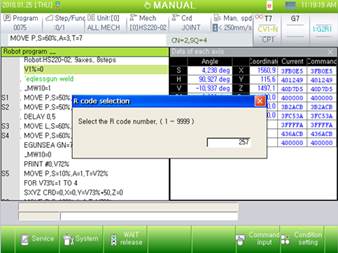
Figure 3.12 R code dialog box
② Choose EN0 or EN2 port of Hi5a controller.
l EN0 corresponds to the CNETN1 connector on the BD511 board.
l EN2 corresponds to the CNETN3 connector on the BD511 board.
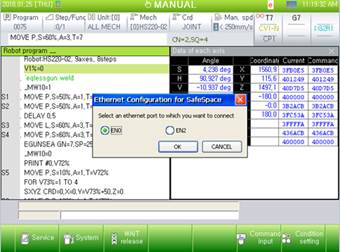
Figure 3.13 Ethernet port selection
2. Select the IP address of Hi5a controller in SafeSpace module side
① If the value of DIP switch of channel 1 is 0, then the default IP address 192.168.1.251will be used for Hi5a controller. (All pins of DIP switch are OFF)
If the value of DIP switch of channel 1 isn’t 0, then IP address 192.168.1.xxx will be used for Hi5a controller. (xxx is the value of DIP switch)
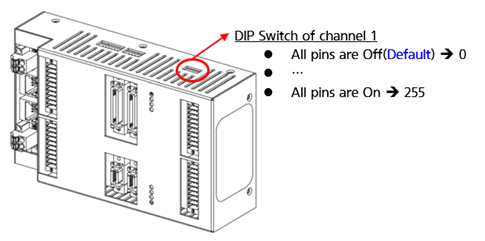
Figure 3.14 DIP switch of channel 1
※ The IP address of SafeSpace module is fixed at 192.168.1.45.
Please avoid using this IP address for Hi5a controller side.
3. Set the IP address of Hi5a controller side.
① Select 『[F2] System』à『2: Control parameter』à『9: Network』à『1: Environment setting』
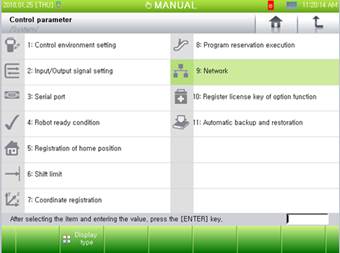
Figure 3.15 Network menu

Figure 3.16Environment setting menu
② Set up the IP address of EN2 or EN0.
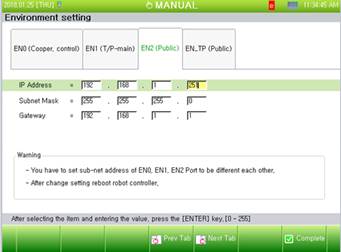
Figure 3.17 IP address
4. Connect an Ethernet cable between Ethernet 1 of SafeSpace module and CNETN3 (EN2) or CNETN1(EN0) of BD511 main board. It is recommended to use STP(Shielded Twisted Pair) cable to enhance noise immunity.
① When the EN2 of Hi5a is used for SafeSpace interface
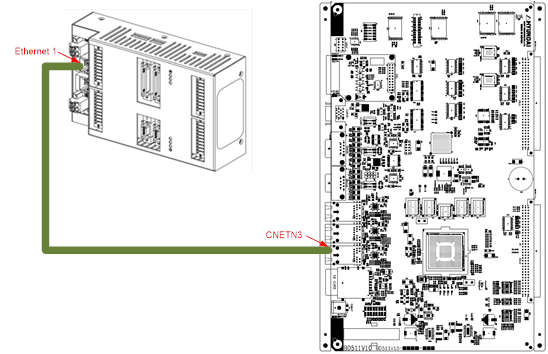
Figure 3.18 Ethernet cable connection for EN2
② When the EN0 of Hi5a is used for SafeSpace interface
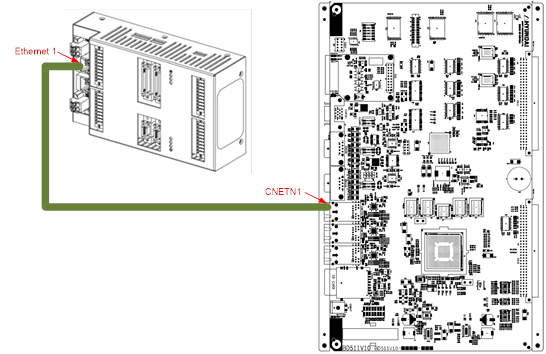
Figure 3.19 Ethernet cable connection for EN0