7.1.4. Operation
7.1.4. Operation
The welding data monitoring screen can be selected by accessing 『[F1]: Service』→『1: Monitoring』→『12: Digital Arc Welding Data』.
There is another way of selecting the screen. Users need to split the screen by using the [Window adjustment] key on the basic screen first before accessing 『[F1]: Content sel』→『12: Digital Arc Welding Data』.
When the monitoring function needs to be run, the ‘Monitoring in detail’ function will be executed basically. It is possible to shift among the monitoring functions by using the [F5] key. The shifting will repeat in the order of ‘Monitoring in detail’ →‘Wave monitoring’→ ‘Wide screen monitoring’ →’ Monitoring in detail’….
In order to use the automatic pop-up for the ‘wide screen monitoring’ function, it is needed to access 『[F2: System]』 → 『4: Application Parameters』 → 『2: Arc Welding』 → 『16: Automatic activation of monitoring during the welding』 and set it as “Enable”
The upsizing function in the welding wave monitoring function makes it possible to move the waves to examine the past (left) and future (right) as well as the high current/voltage (up) and low current/voltage (down) and compare with the current state. In order to move in a desired direction, touch the wave monitoring screen to activate it, and then press the [Up/Down/Left/Right] cursor. Then, the graphs will move. If it is necessary to move farther in the past (left) or future (right) direction, you can move at a scope 10 times wider.
Press [SHIFT] + [UP] to look at waves in detail and press [SHIFT] + [DOWN] to look at waves in an overall pattern. In order to look at the current data in the while examining at the past data, press [ENTER] to go back to the current screen
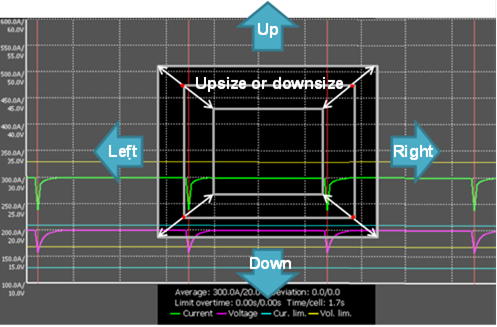
Figure 7.4 Arc welding waveform monitoring upsizing function