2.3.2. Initial Setting
2.3.2. Initial Setting
Initial setting is executed only when firstly installing Robot or when the Robot controller does not properly operate and the procedure is as follow :
(1) Check whether the title display window of the teach pendant is in MANUAL mode. If it is in AUTO mode, switch the [REMOTE/AUTO/MANUAL] switch on the teach pendant to [MANUAL].
(2) Select the『[F2]: System』 → 『5: Initialize』 → 『1: System format』. When you reset the system, not just the control parameter file and mechanical parameter file, but all programs will be deleted. Therefore, do not use this function except for when you are installing the system for the first time.
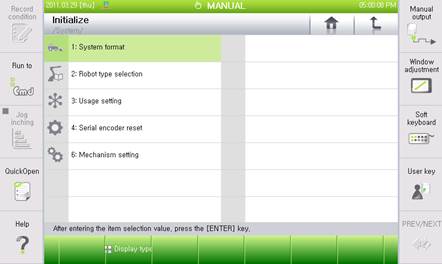
Figure 2.20 Initialization menu screen
(3) Select the type of Robot which the controller is attached to.
(4) If you have additional axis, enter the number of additional axes and press the 『[F7]: Complete』 key.
(5) Turn power of the controller from Off to On by using the main power switch in the left top end in the front of the controller.
(6) Execute encoder offset calibration from the 『[F2]: System』 → 『3: Robot parameter』 → 『4: Encoder offset』. The Motor On function can be made operable only when the Encoder Offset function is implemented, even when the robot may not in a reference posture
(7) Turn power of the controller from Off to On.
(8) Supply power to the motor. (Motor ON)
(9) Move Robot as standard posture with Manual operation and then execute encoder offset calibration once again. These values are used as position to reset the encoder when replacing the motor.
(10) Select program No. 9999 by pressing the [SHIFT(FAST)]+[PROG/STEP] key of the teach pendant and then record a step. This position is used as standard position of Robot.

l To reset the system, consult the engineer.