4.6. Shift message box
4.6. Shift message box
By using the shift message box, you can move or rotate 1 or more models.
For example, let’s assume there is a model with the following hierarchy structure and try to shift the cylinder and rectangular pillar simultaneously in +Z direction.


Click on the shift message box button from the Standard tool bar.

Or you can select, 『View - Shift』 from the main menu.
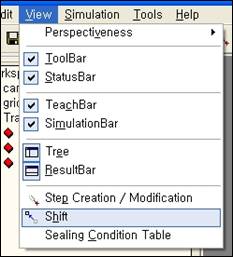
The following shift message box appears.
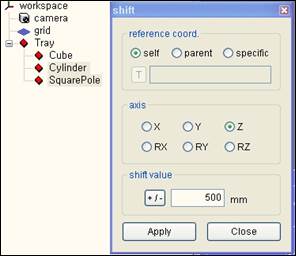
Refer to the following table to set the reference coordinate, axis and shift.
Reference coordinate | To shift based on the coordinate of the object itself, set the reference coordinate as ‘Self’. To shift based on the parent coordinate, set the reference coordinate as ‘Parent’. To shift based on a specific coordinate other than the above, set the reference coordinate as ‘specific’ and press the T button to click on the model to set as reference from the tree window, and enter the T path. |
Axis | When you select X, Y or Z axis, it shifts in the direction of that axis. When you select RX, RY or RZ axis, it rotates based on this axis. |
Shift | Enter the shift distance (or rotation angle). You can change the sign of the entered value by pressing the |
 button.
Select the model to shift in the tree window or 3-D screen. (To select multiple number of models, click on the models with the [Ctrl] or [Shift] key pressed.)
Now when you click on the apply button of the shift message box, you can see the selected model shifted in the 3-D screen. That is, the location properties among the model properties of the selected model have changed.

When you continuously click on the apply button, it will shift for every click.
The following picture is the result of clicking the apply button 3 times.

Click on the close button to close the shift message box.