4.2. Configure and Edit Model 1
4.2. Configure and Edit Model 1
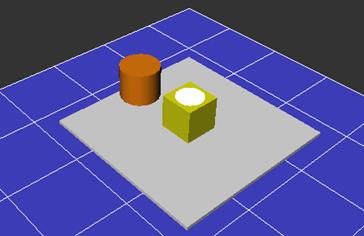
Let’s configure the hierarchy structure of the following models.

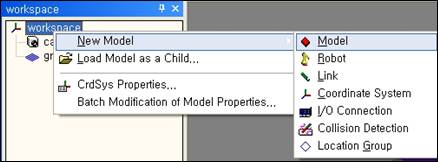
When you right click on the workspace of the tree window, the popup menu will be displayed. When you select new model, the sub menu will be displayed and you can select the 『Model』.
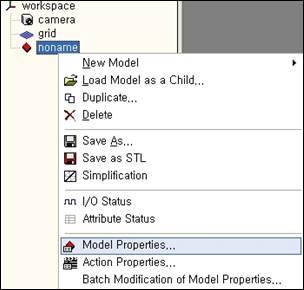
A new model named “no name” is created under the workspace. In the 3-D screen, nothing appears yet. This is because the model shape has not been defined yet.

Now, right click on “noname”, and select the model properties.
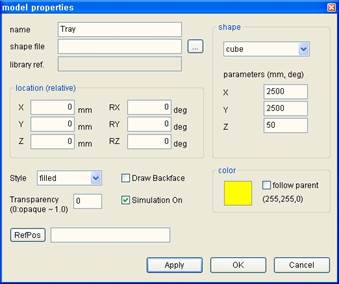
When the model properties window appears, select the drop down list box to select the 3-D rectangular box as shown in the following picture. Leave the other parameters and click OK.
When the properties window appears, edit the name, shape, shape parameter and color as follows. (When editing the color, click on the colored rectangle and set it in the window.)
The tray appears in the 3-D screen as follows.

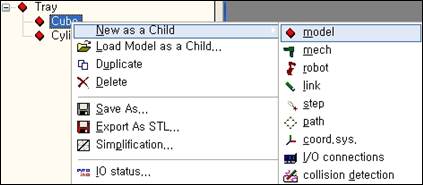
This time, right click on the tray of the tree window and select『New as a Child - Model』 from the popup menu again.
Now the following hierarchy is configured.

Right click on the noname model under the tray and select model properties. Enter the following information in the model properties window and click on OK.

As shown in the following picture, the cube is shown on the tray.

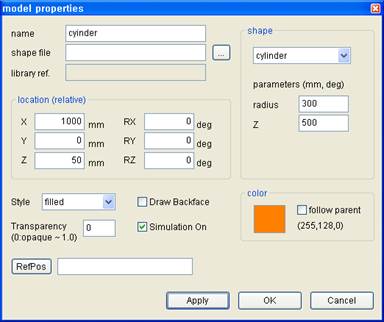
In the same method as the cube, create a cylinder. Set the model properties as follows.
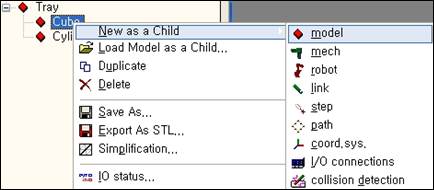
The hierarchy structure of the tree window will now be as follows. Open the popup menu for the cube and select『New as a Child - Model』.
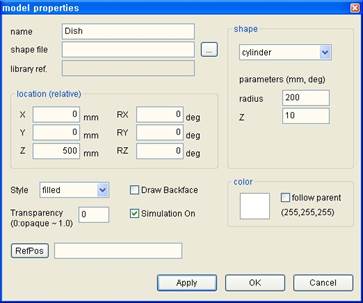
Enter the model properties of the noname under the cube.
You will obtain your planned results.

