5.7. Automatic setting of slave devices using the automatic network scan function
5.7. Automatic setting of slave devices using the automatic network scan function
If all slave devices are already connected to the Fieldbus network, simple automatic setting can be used.
(1) Set Master and Bus Parameter in a new project first.
(2) Select 『Online – Auto Network Scan』from the menu.
If communication has been established, a dialog box will be displayed immediately, as shown in [Figure 5.18]. Please refer to [Note 5-3: Establishing communication] if another type of dialog box is displayed.
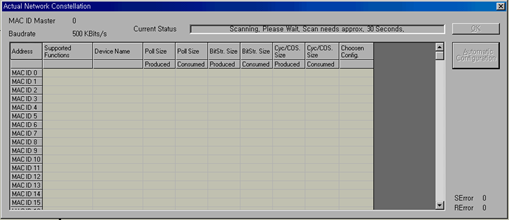
Figure 5.18 Actual Network Constellation dialog box – Scanning
(3) Be prepared to wait for a while, as the network scan will take about 30 seconds. When the scan is completed successfully, the state will become as shown in [Figure 5.19]. In this example, it was assumed that “Panel View” and “UCS-EV2” device are set as MAC ID 5 and 6, respectively, and are connected to the network.
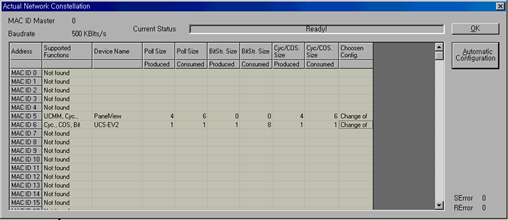
Figure 5.19 Actual Network Constellation dialog box – Scan finished.
(4) Communication method can be changed by double-clicking the 『Chosen Config.』 field in this list. If the result is satisfactory, the contents of the scan can be reflected in the project by clicking the [Automatic Configuration] button.
(5) After clicking [OK] and closing the dialog box, the result of reflecting the contents on the project will be shown as in [Figure 5.20].
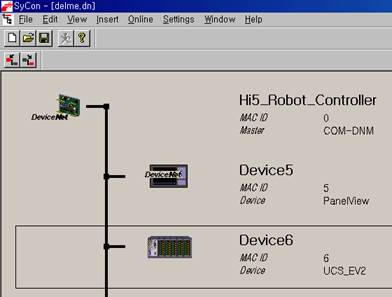
Figure 5.20 Result of reflecting the contents of scan (DeviceNet)
(6) To adjust the settings of each slave, double-click the slave picture that you want to adjust as in the manual setting.
If communication is not established, a dialog box will be shown, as in [Figure 5.21].
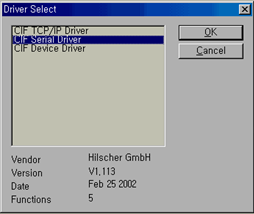
Figure 5.21 Driver Select dialog box
After selecting CIF Serial Driver from the list box and clicking “OK”, a dialog box will be displayed as in [Figure 5.22].
Figure 5.22 Device Assignment CIF Serial Driver
Confirm the RS-232C COM port number of the PC connected to the master module, and click the corresponding [Connect COM ?] button. If the connection is normal, the name and version of the module will be displayed immediately, and the checkbox on the left side will be activated. If this does not occur, the connection will not be established correctly.
Check to determine that the wiring and connection of the cable has been done correctly, that the type of master module is correct, and that power is being supplied.
There may also be connection problems in the event that another project window is opened, or if it is already connected to another channel of BD52x. In these cases, save the project, turn SyCon off and on, and retry.
When the connection is made successfully, check it by clicking the checkbox and click [OK] button. |
 N
N