6.3. Basic pattern
6.3. Basic pattern
Set each element on the following pictures.
(1) Wall direction: Vertical direction (2) Wall direction: Horizontal direction
(3) Wall direction: torch position standard
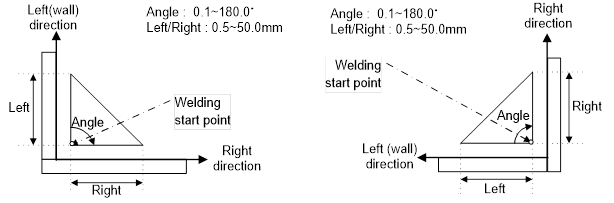
Figure 6.2 Weaving elements according to the wall direction
(1) Left direction distance: Sets the distance of the left (wall) direction.
(2) Right direction distance: Sets the distance of the right direction.
(3) Angle:
Sets the left (wall) direction and right direction angles as shown in Figure 6.2. The angle indicates from the left (wall) direction to the right direction. But, this angle is ignored when using REFP 4.
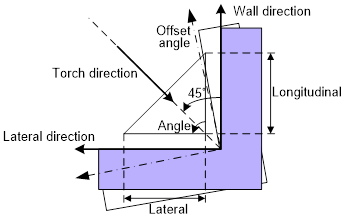
(4) Wall direction:
For setting to decide whether the vertical direction (Figure (1), the horizontal direction (Figure (2) or the torch position direction (Figure (3) will be used as the left (wall) direction. In general, the vertical direction is used as the left (wall) direction, while the horizontal direction is mainly used for a 180-degree weaving work that is to be performed on a flat surface. The left (wall) direction for a weaving work that will be performed based on the torch position direction will be set to be counterclockwise based on the weaving moving direction (The moving direction in Figure (3) is outward bound direction, ⊙). In case of the weaving work based on the torch position direction, it is possible to respond to all different left (wall) directions and also respond to cases in which the left (wall) direction changes in the middle of weaving.
(5) Offset angle
If the wall direction is set based on the torch position direction, the rotating angle for the weaving surface is to be set based on the weaving moving direction (The moving direction in Figure (3) is outward bound direction, ⊙). When 0 degree is set, the angle created between the left (wall) direction and the right direction needs to be cut in half.