4.5. Checking the timing belt
4.5. Checking the timing belt
HH4 has a part where the timing belt is applied to the driving part.
For the operating assembly of the timing belt, check the tension of the belt after every 1,500 hours and when there is vibration/noise on the belt. If the tension of the timing belt is not appropriate, it may have a severely negative effect on the performance of the robot.
Ex)
n Checking the timing belts of S/H/V axes
① Turn off the power.
② Disassemble the base body, lower frame and upper side cover.
③ Press the timing belt with the given force (F = 0.2 kgf) as shown in the figure.
④ Check the pressing amount.
⑤ If it does not match the proper pressing amount (3.4 mm), loosen the motor flange slightly.
⑥ Set the tension of the timing belt.
-S, H and V axes: 7.2 kgf (71 N)
⑦ Fasten the motor flange bolts tightly.
-H axis: 310 kgf·cm
-V axis: 127 kgf·cm
⑧ Assemble the Base body and lower/upper cover.
⑨ Turn on the power.
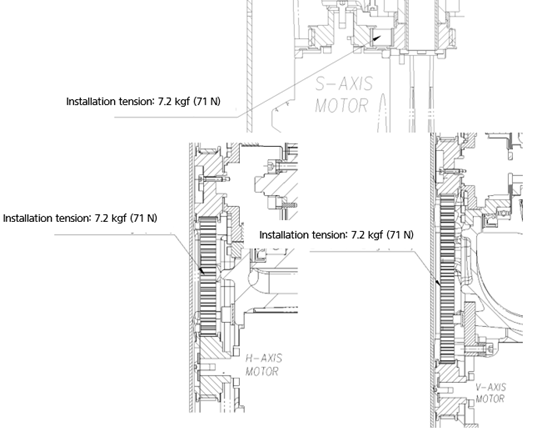
Figure4.3 Area of the timing belts of the S, H and V axes whose tension needs to be checked
n Checking the timing belts of the R2/B/R1 axes
① Turn off the power.
② Disassemble the wrist cover.
③ Press the timing belt with the given force (F = 0.2 kgf) as shown in the figure.
④ Check the pressing amount.
⑤ If it does not match the proper pressing amount (3.4 mm), loosen the motor flange slightly.
⑥ Set the tension of the timing belt.
-R2, B, and R1 axes: 3 kgf (29 N)
⑦ Fasten the motor flange bolts tightly (37 kgf·cm).
⑧ Assemble the relevant cover of each axis.
⑨ Turn on the power.
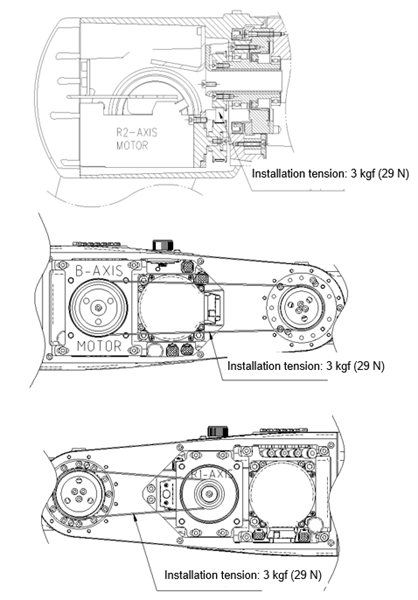
Figure 4.4 Area of the timing belts of the R2/B/R1 axes whose tension needs to be checked