2.2. Installation of force sensor
2.2. Installation of force sensor
This section covers general issues regardless of the sensor type. For more details on the installation of individual sensors, refer to the appendix.
① Set the axis R1 and R2 of robot to 0 deg. Then, install the sensor on the robot.
② Connect the sensor and the robot controller using the communication cable.
③ Connect the power to the sensor and the communication module.
④ Set suitable communication environment for the sensor.
A. Ethernet communication-based sensor (e.g., 6-axis sensor from ATI)
In the TP, set the IP of EN2 (common) as shown in Fig. 1. Enter a number between 2 and 255 in the last section of the IP address.
(『[F2]: System』 → 『2: Control Parameter』 → 『9: Network』 → 『1: Configuration』)
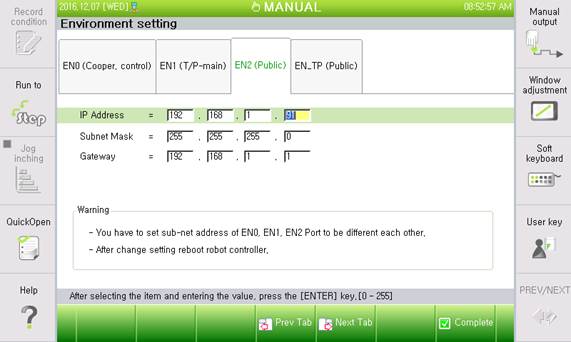
Figure 2.1 Controller network configuration
B. Serial communication based sensor (e.g., a load cell from Burster)
Select a serial port for the controller in the following path. Then, set the communication environment.
(『[F2]: System』 → 『2: Control Parameter』 → 『3: Serial Port』)
To install, check first the communication setting of the sensor module. For the communication settings of the sensor module, check the appendix.
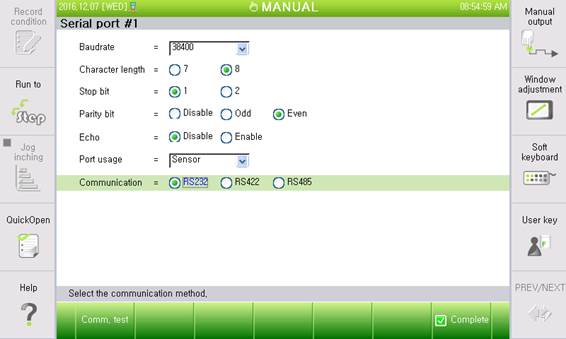
Figure 2.2 Serial port configuration