4.2. Optical Device Installation
4.2. Optical Device Installation
Install the camera and lighting according to the using purpose.
The following figure shows that if HRVision 3D-Stereo is run after the optical equipment and the HRVision 3D-Stereo program are installed, the initial screen of HRVision 3D-Stereo will be generated, as shown below.
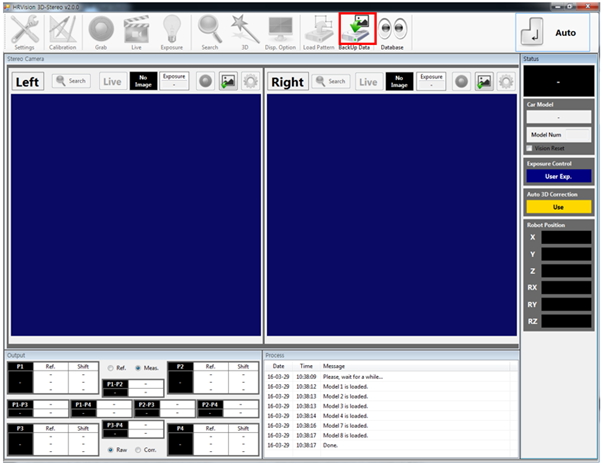
In the initial execution screen, as the camera type is not set, the image may not be acquired normally. Go to the “Setting” menu, and set the camera type.
It is required to input a password to go to the setting menu such as “Settings” and “Calibration.” You are kindly required to contact the supplier for inquiries with regard to the password.

Clicking “Settings → Camera”will generate the following dialog. Set the camera type suitable for the process, and then save it.
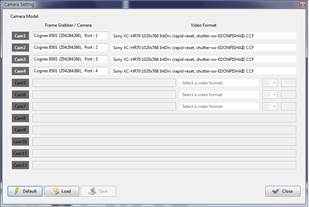
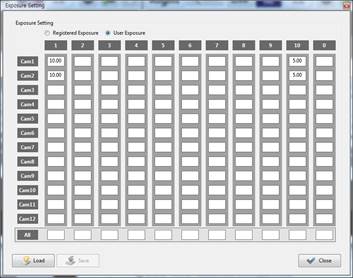
Set the type of the installed camera and the exposure by clicking “Settings → Camera.”
Check whether the image is acquired normally by clicking “Grab” or “Live” on the operating button.
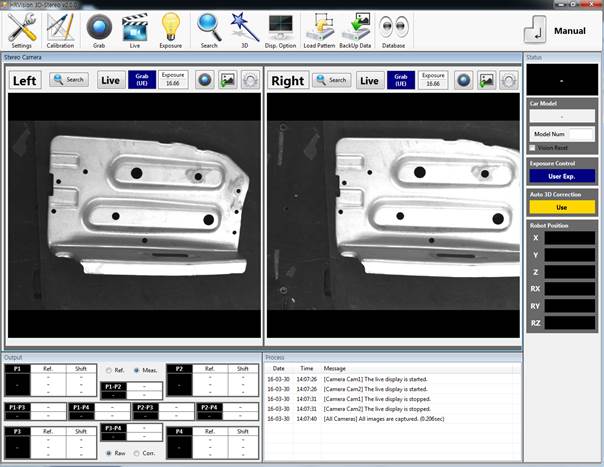
Set the distance between the work target and the camera, and the lens focus and aperture to fit the condition.
Fix the camera so that gap cannot be formed. Check the lens focus ring and the aperture ring.
After completing vision installation, check whether images are normally acquired while the adjacent equipment are operating.
If image noises occur, check on the insulation condition of the camera and the cable.