3.2. BD525 PROFIBUS master network setting
3.2. BD525 PROFIBUS master network setting
To set the BD525 PROFIBUS-DP master network, the following procedure should be executed. For more details, refer to a separate SYCON.net manual.
(1) Installing a slave GSD file in SYCON.net
*Network > Import Device Description* needs to be executed to install the EDS file of the slave system that needs to be connected to the BD525 PROFIBUS-DP master.
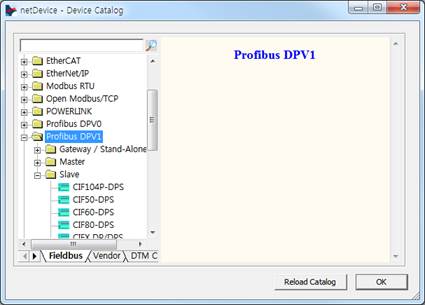
(2) Reloading the Device Catalog
*Network > Device Catalog* needs to be executed before pressing the *Reload Catalog button* to reload the Device Catalogue of SYCON.net to show newly registered devices.
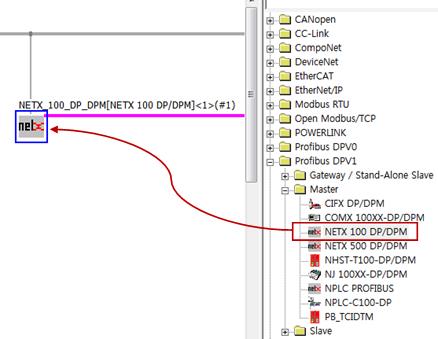
(3) Inserting the master in the project
In the Device Catalog of SYCON.net, drag and drop NETX 100 DP/DPM, which is the BD525 PROFIBUS-DP master, into the network view line.
(4) Adding the slave device to the master
In the Device Catalog of SYCON.net, drag and drop a slave device that needs to be connected to BD525 PROFIBUS-DP master, into the network view line.

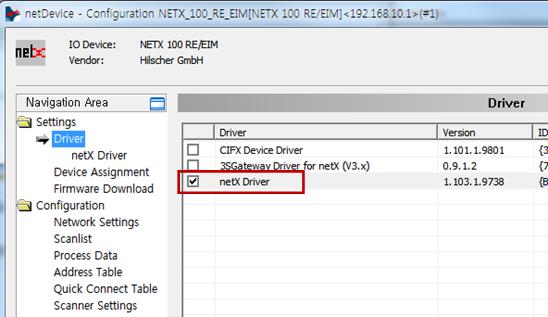
(5) Setting the USB connection between Sycon.net and BD525 master
Connect the USB cable to the BD525 master USB connector, and double-click the master icon of Sycon.net to select a driver and carry out various types of icon settings.
① Select *Settings > Driver *and then select “netX Driver” before selecting “Apply” button (Check the “netX Driver” check box before clicking the “Apply” button).
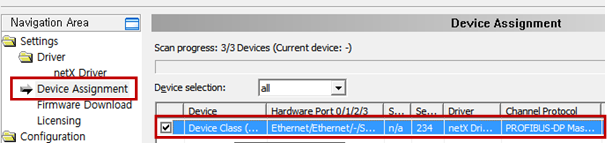
② Select* Settings > Device Assignment*and select a scanner device before clicking the “Apply” button. If the PROFIBUS-DP master is not displayed, change from “Device selection” to “all” before clicking the “Scan” button.
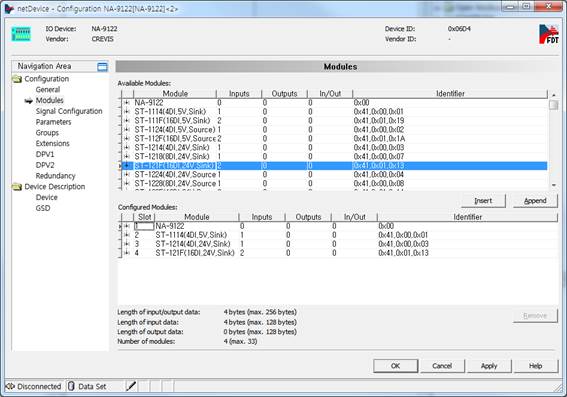
(6) Setting the slave
Double-click the slave device that needs to be set, and set individual items, such as General and Modules.
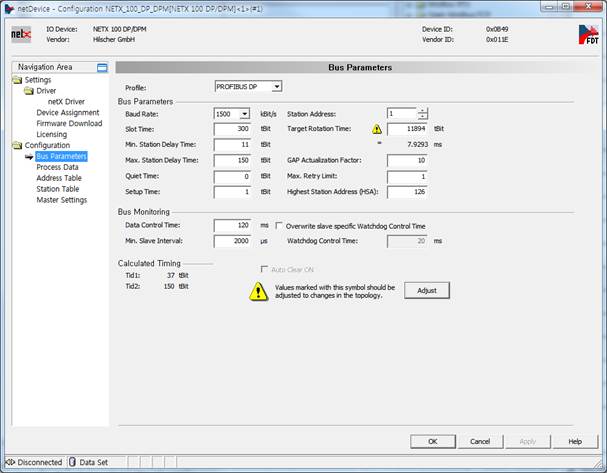
(7) Setting the BD525 master
Double-click the master to set individual items of configuration.
(8) Connecting BD525 with USB
Select “Connect” by clicking the right mouse button on the master icon.

(9) Downloading the setting result
Select “Download” by clicking the right mouse button on the master icon.


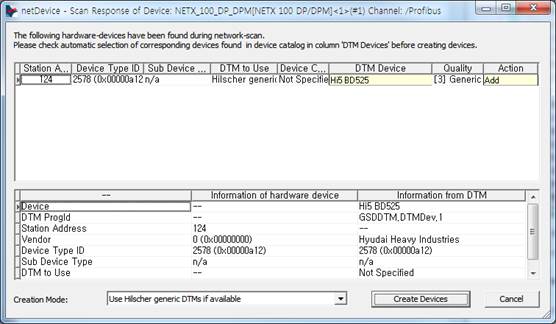
l In addition to the methods of connecting slave devices manually, it is also possible for the slave devices connected to the master to be searched automatically when the Network Scan menu is executed.

Thus, searched slave devices can be added automatically by clicking the Create Devices button after setting in a desired way in the Scan Response of Device dialog box that will be displayed when Network Scan is executed.