3.3. Creating Welding Gun Pose
3.3. Creating Welding Gun Pose
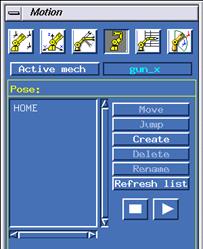
Figure 3.6 Pose tab of Motion dialog box
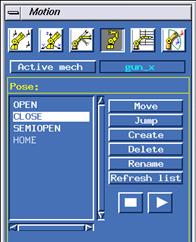
Figure 3.7 The state of welding gun Pose defined

Figure 3.8 Pose create dialog box
Each pressurized and open state of a welding gun should be defined as a separate pose. If a welding gun is a 2-column gun, the state at the time the X1 and X2 signal are given should be defined also.
Open the motion dialog box, click the <Active mech> button and select a welding gun. When the pose tab in the motion dialog box is clicked, the state will become as shown in [Figure 3.6]. Defined poses will be listed in the list box. The example shown in Figure 3.8 is the state of only one pose, which is called HOME.
When the [Create] button is clicked, a dialog box will be displayed as shown in [Figure 3.8]. The user can input poses using this dialog box. The units used are degrees for the X gun and mm for the C gun. The 3 poses described in [Table 3-2] should be created
Table 3‑2 Welding gun pose
The name of pose | Description |
CLOSE | Gun is closed. (Pressurized state) |
SEMIOPEN | Gun is semi-opened. - Apply this for 2-column gun - SEMIOPEN (MX On) |
OPEN | Gun is opened (OPEN) |
When the poses required have been created, the state will become as shown in [Figure 3.7].