1.2. Reference Point Registration
1.2. Reference Point Registration
This section describes the process of registering reference points for workpieces. | |
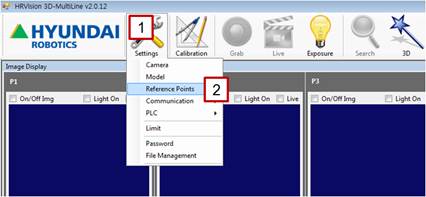
[Step 1] (1) In the main menu, click the [Settings] button. (2) Select the [Reference Points] menu. | |
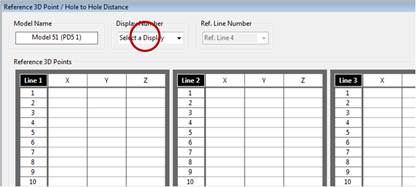
[Step 2] (1) Select [Display Number]. (2) The [Display Number] matches the number of the point measured by the camera.
| |
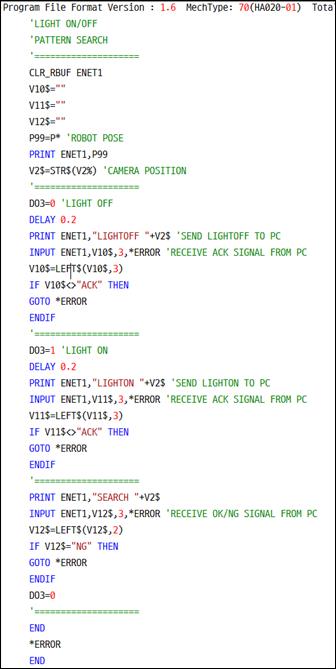
[Step 3] (1) Referring to the example, write a robot job program that turns on/off the line pattern light of the projector and detects a pattern.
| |
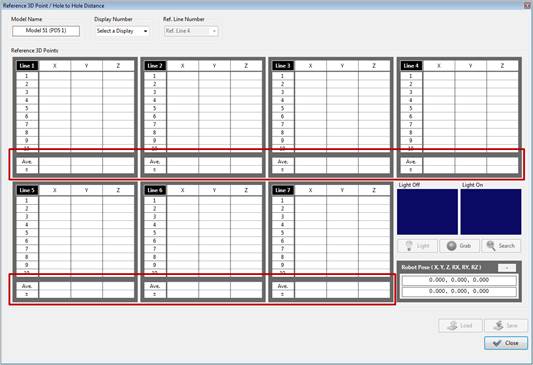
[Step 4] (1) Repeat the written robot job program for 10 times. The average value will appear in the [Ave.] section, and the accuracy of repeatability will appear in the [±] column. (2) If the accuracy of repeatability exceeds 1 mm, which means that the pattern detection is inaccurate, decrease the value of the accuracy of repeatability by changing either the registered position of the pattern or the set value. (3) If the camera is mounted on the robot, check whether the correct pose value is displayed in [Robot Pose]. In addition, check whether the correct [Coordinate System] is displayed at the upper right part of [Robot Pose], as shown in the following figure. Check whether the robot pose is received in the desired coordinate system: [-] will be displayed for the base coordinate system, [R] for the robot coordinate system, and [Un] for the user coordinate system.
(4) If there are no problems, save the setting by clicking the [Save] button. Repeat the same procedure for the cameras in other points.
|