5.2. Pattern creating progressing in stages
5.2. Pattern creating progressing in stages
(1) First, execute HRpal V1.0 and press the Pallet button.
(2) Input ‘pallet’ into the pallet name section, and input 1,100, 1,100, 150, 10, and 600 in to the length, width, height, weight, and weight capacity sections individually in sequence (Figure 5.2).
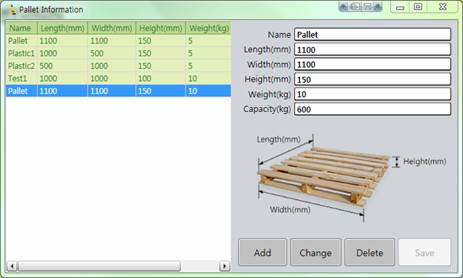
Figure 5.2 Pallet information input
(3) Input the relevant package and slip sheet information by taking into consideration the above environment configuration (Figure 5.3, Figure 5.4).
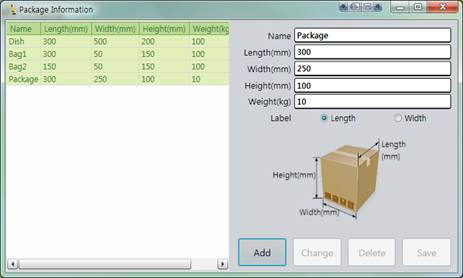
Figure 5.3 Package information input
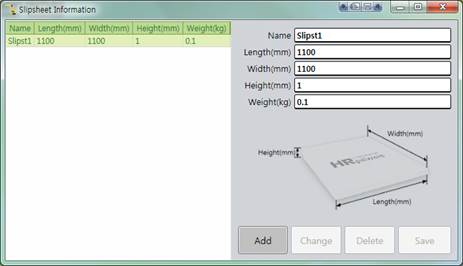
Figure 5.4 Slip sheet information input
(4) Press the Pattern Create button to create a pattern based on the inputted information.
(5) Input the necessary information to create a pattern by referring to (Figure 5.5) shown below.
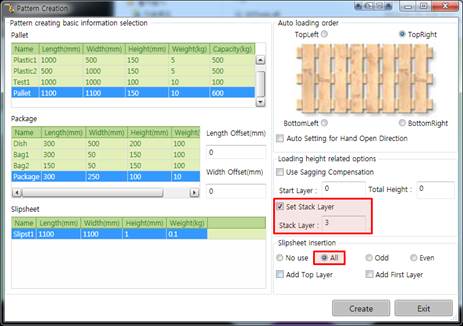
Figure 5.5 Pattern creating
(6) Select the best pattern among the thus created ones, press the Save button, name the pattern as 4 x 4, and press the OK button to save it before ending the window (Figure 5.6).
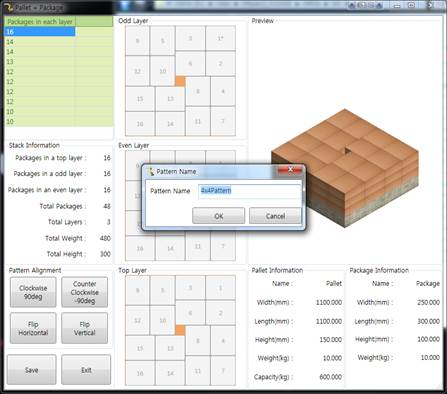
Figure 5.6 Pattern saving
(7) To create a job program and the HRSpae3 project file for the created pattern, it is needed to enter the pattern managing menu and designate the register number for the relevant pattern (Figure 5.7).
(8) Check the reference positions that need to be taught to the robot (Figure 5.7). (* position)
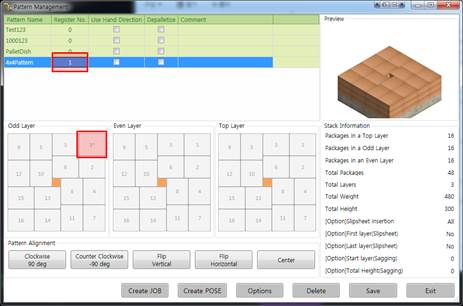
Figure 5.7 Register number designation and teach position checking
(9) Press the Job Create button and select a folder where the user wants to create a job program and HRSpace3 project file (Figure 5.8). Here, the HRSpace Simulation folder is created on the background screen for the use.
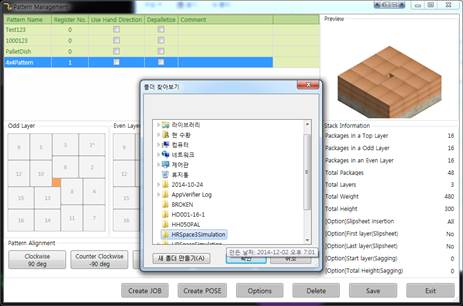
Figure 5.8 Job creating