4.2. Ethernet/IP network configuration
4.2. Ethernet/IP network configuration
The following procedure should be observed to configure the network of the BD525 Ethernet/IP scanner. Refer to the DTM for Ethernet/IP Scanner Devices manual for more details.
(1) Register the Ethernet/IP adapter to SYCON.net
Execute *Network > Import Device Description*to register the EDS file of the Ethernet/IP adapter that needs to be connected to the Ethernet/IP scanner, and then register it to the device catalog of SYCON.net.
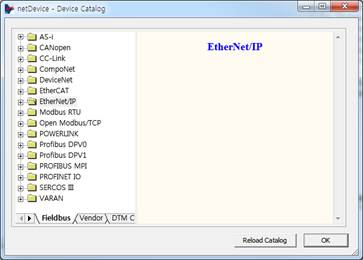
(2) Reload the device catalog
After executing *Network > Device Catalog*,*click the Reload Catalog button* to reload the device catalog of SYCON.net to allow the newly registered adapter to be displayed.
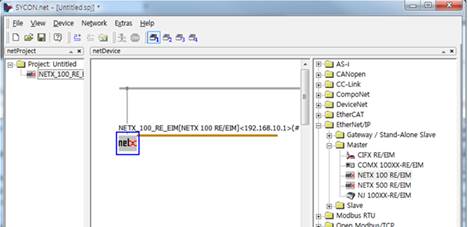
(3) Insert the Ethernet/IP scanner, NETX 100 RE/EIM
Drag the Ethernet/IP scanner from the device catalog of SYCON.net and drop it to the network view line. In case of the BD525 Ethernet/IP scanner, the NETX 100 RE/EIM of the master folders of the Ethernet/IP folder needs to be used.
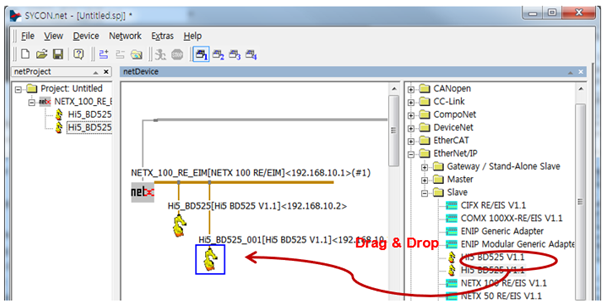
(4) Insert the Ethernet/IP adapter
Drag the Ethernet/IP adapter that needs to be connected to BD525 from the device catalog of SYCON.net, and drop and connect it to the bus of the network view.
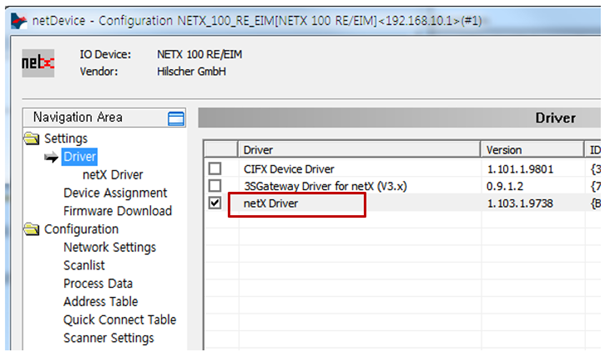
(5) Set the Ethernet/IP scanner (NETX 100 RE/EIM)
Double-click the NETX 100 RE/EIM icon to set the following items.
① Select *Settings > Driver*and “netX Driver” and click the “Apply” button (Check the checkbox for “netX Driver” and then click the “Apply” button.
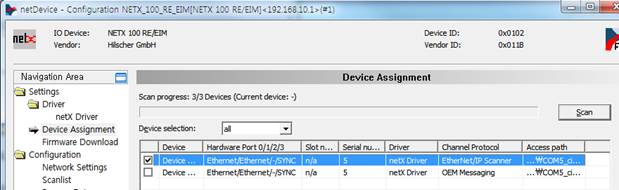
② Select *Settings > Device Assignment*and then select the scanner and then click the “Apply” button. If the Ethernet/IP scanner does not show up, change the “Device selection” to the “All” state and then click the “Scan” button.
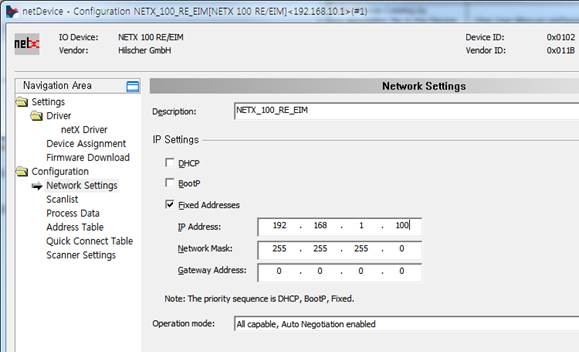
③ Select *Configuration > Network Settings*and then set the network information such as the IP address of the Ethernet/IP scanner and then click the “Apply” button.
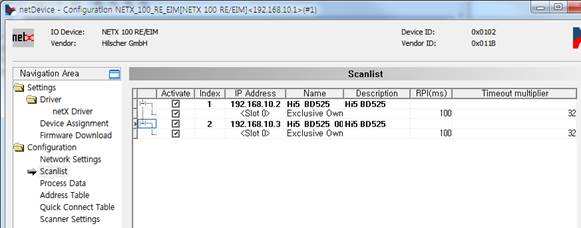
④ Select *Configuration > Scanlist*and then set the network information such as the IP address of the Ethernet/IP scanner and its name, and then click the “Apply” button.
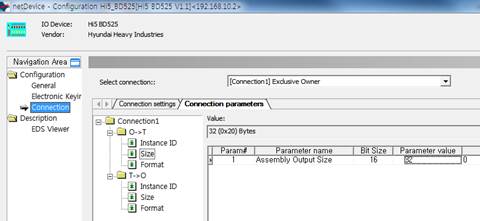
(6) Set the Ethernet/IP adapter
Double-click the icon of the Ethernet/IP adapter for setting the following items.
① Click *Configuration > Connection*for setting “Connection settings”.
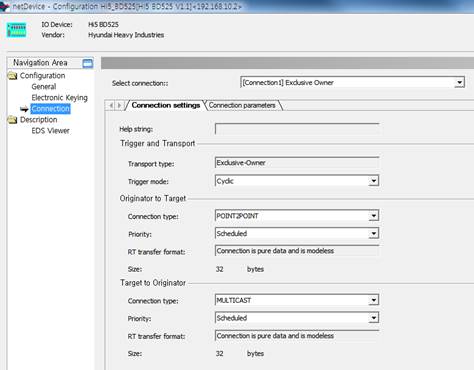
② Set the size of the input and output data through the *Connection Parameter* tab.
(7) Download
Click *Device > Download* to download the set information through the BD525 Ethernet/IP scanner.