3.3. RSLogix5000 setting example
3.3. RSLogix5000 setting example
The following examples below show how to carry out the settings to open the communication with the Hi5/Hi5a Ethernet/IP adapter by using RSLogix5000 software.
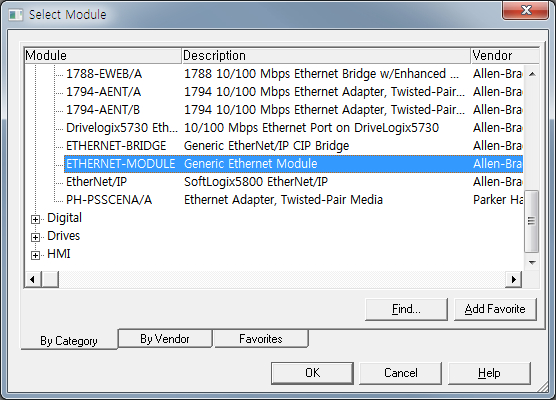
(1) To add the Hi5/Hi5a Ethernet/IP adapter, place the cursor on Ethernet of I/O Configuration of the RSLogix5000 screen and click the right button of the mouse to select “New Module.”

(2) Select “Generic Ethernet Module” in the Communication category of the Select Module dialogue box, and the click the OK button.
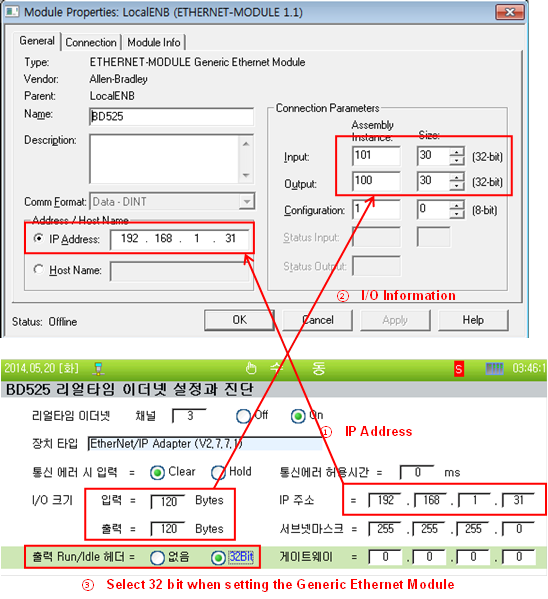
(3) Select the General tap in the Generic Ethernet Module Properties box and input the data into Connection Parameters while paying attention to the units of IP Address and IO Size in the same way as setting the Hi5/Hi5a controller. For your information, because in this example, the I/O size is set as 120 byte in the Hi5/Hi5a controller, it is needed to input 30 DINT (32bit) in RSLogix5000.
☞ RSLogix5000 setting input instance = 101
☞ RSLogix5000 setting output instance = 100
☞ RSLogix5000 setting configuration instance = None (Size = 0)
☞ Hi5/Hi5a controller setting output run/idle header = Select 32 bit
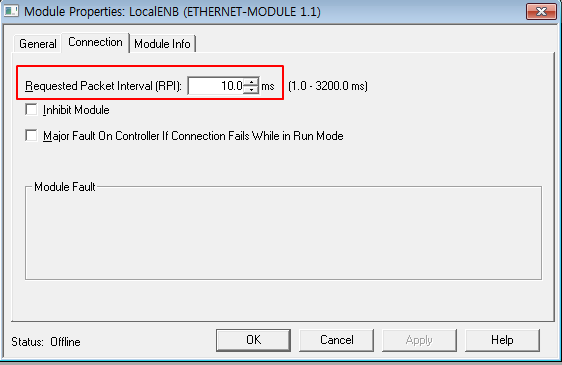
(4) Input the data in RPI (Requested Packet Interval) by clicking the Connection tap of the Module Properties dialogue box. In this example, RPI is set as 100 ms and PLC transmits output data (Robot controller side input FB3.X) to the robot controller every 10 ms. The robot controller also transmits input data (Robot controller input side FB3.Y) every 10 ms.
(5) Click the OK button and download the data to PLC.