3.1. Setting and saving
3.1. Setting and saving
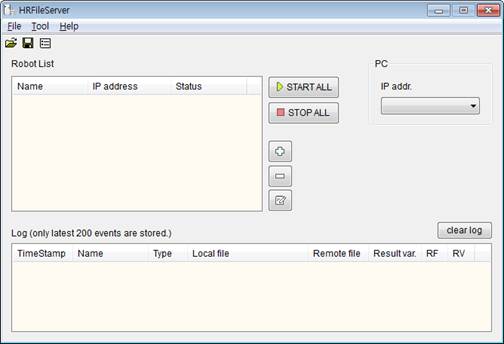
Figure 3.1 HRFileServer dialog box
When you start the HRFileServer, the dialog box shows up as figure 3.1.
First, select the PC’s IP address. You have to select the IP address of Ethernet adapter that belongs to the same network with Hi5 controllers. (When you connect to HRSpace3’s virtual controller, select 127.0.0.1(localhost)

Second, click  button to add the names of robot to be serviced and the IP addresses of the Hi5 controllers to the robot list.

For deleting the list item use  button, and for modifying use
 button.
Next, select the [Tool – Option] menu.

Figure 3.2 Option dialog box
Base path is the front part of the PC-side path. The relative path used in LOADF, SAVEF is concatenated to this base path. (Detailed example is explained in the next section.)
Log is the path in which the file service log file is stored.
When empty, the log file is not generated.
Now, save the settings as a project file using [File – Save] menu. (File extension name is “.hrfs”)