2.1. System initialization
2.1. System initialization
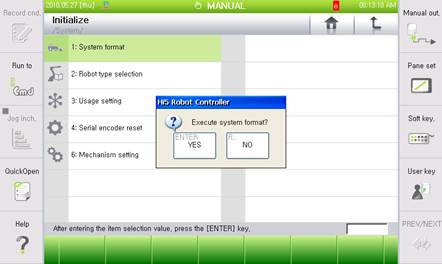
(1) When setting the controller for the first time, the system must be initialized. The following menu is provided at 『[F2]: System』→ 『5: Initialize』 → 『1: System format』. Select initialize system and then press the “YES” button.
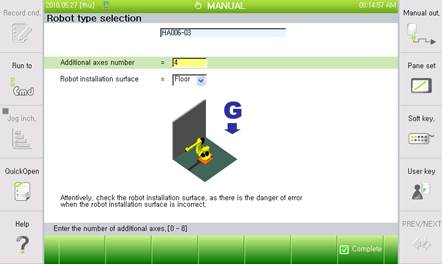
(2) After the system is initialized, select the robot type. When you select the robot type, the following screen will be displayed. At this time, enter the total number of additional axes to use. Also set the installation surface of the robot. When the setting is completed, press the 『[F7]: Complete』 key.
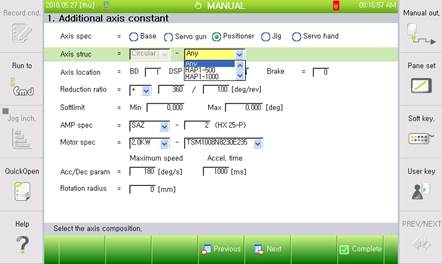
(3) Then when the “Set constant for additional axis?” message, click on Yes. The next screen will be displayed. In this screen the axis specification of the additional axis applicable to the positioner is set as the positioner and the applicable parameter is set. For positioner not provided by HHI, set to ‘Any’ and set the remaining parameters. Refer to ‘User manual of additional axis function’ on how to set the additional axis parameter.
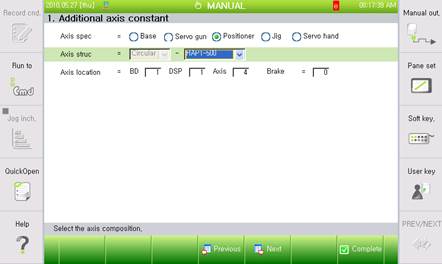
(4) When using the positioner provided by HHI, select from the list in the axis structure. In this case, no other parameter setting is required.
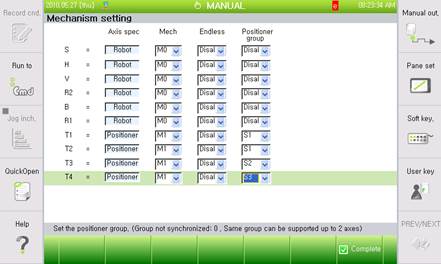
(5) The positioner group is set in 『[F2]: System』 → 『5: Initialize』 → 『6: Mechanism setting』 menu. In the following screenshot, T1 and T2 are set to group 1 as 2 axes positioner and T3 axis is set to group 2 as 1 axis positioner and lastly T4 axis is set to group 3 as 1 axis positioner. Generally it is convenient to set the mechanism to the same way as the position group.
(6) When the power is rebooted, the mechanism and positioner group are normally applied.